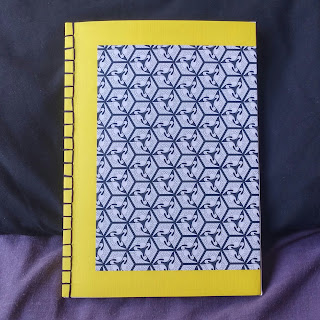
In a rather fetching yellow and with added origami paper for extra oriental effect: my first bound book!
This will contain nature sketches and such.
I am very pleased with how this turned out, and it was really easy too. Here's how I did it:
- Get a big stack of paper and make sure it's all nicely lined up (Mine's A5)
- Tie up paper so it doesn't shift around
- Mark with pencil where you want the holes to be
- Drill (or somehow otherwise make) holes through the whole stack. Be careful to not set your paper alight!
- Score cover with a ruler and knife so it bends nicely around the stack
- Poke needle holes through the cover corresponding with holes through the stack (neater than drilling the cover since drilling leaves a burnt edge.)
- Sew it all together with a needle and embroidery thread (I used the Japanese 4-hole book binding technique, but with 20 holes instead.)
- Add any embellishments, and you're good to go!
In less than an hour, you have a whole new book that can look any way you want! This was so easy I may even bind my final dissertation myself, although that's two years from now. Next time I may use already drawn-on or written on pages. It'd make another good 'make her cry' gift for my mum. (Sounds weird out of context, but since I mixed her a CD that made her cry, I've tried to keep giving her really good presents.)
I added a big kanji letter for 'quiet' to the first page to cover up the burn flecks from drilling. (Protect your first page like I didn't!)
I feel kind of serene just looking at it, and it's special since it's unlike any other book I have. It makes me want to go out with a pencil and sit on the ground and sketch bugs and plants.
Limpet x


No comments:
Post a Comment